When it comes to woodworking and crafting with natural, unfinished wood, preserving and enhancing its beauty is essential. Whether you’re working on a DIY project, building furniture, or restoring an antique piece, choosing the right oil for your unfinished wood can make all the difference. In this comprehensive guide, we will explore the various types of wood oils, their benefits, and how to use them to bring out the best in your projects. The article is developed by firstgradeappliances.com
Why Choose Wood Oil?
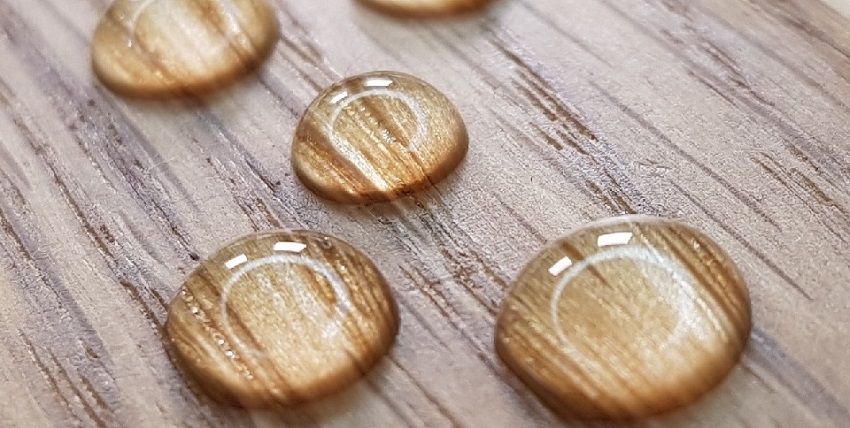
Wood oil has been used for centuries to protect and enhance the natural beauty of wood surfaces. Unlike varnishes and lacquers, which form a hard, protective film on the wood’s surface, wood oils penetrate deep into the wood fibers, nourishing and enriching them from within. This allows the wood to breathe while providing protection against moisture, UV rays, and daily wear and tear. Additionally, wood oils give the wood a natural, warm finish, bringing out its unique grain patterns and colors.
Types of Wood Oils
There are several types of wood oils available, each with its unique characteristics and uses. Let’s explore some of the most popular ones:
1. Linseed Oil
Linseed oil is one of the oldest and most traditional wood oils used for finishing and preserving wood. It is derived from flaxseed and is available in both raw and boiled forms. Raw linseed oil takes longer to dry but provides a more natural finish, while boiled linseed oil has drying agents added to speed up the drying process.
Linseed oil is an excellent option for unfinished wood due to its affordability, easy application, and ability to highlight the wood’s natural beauty. It enhances the grain patterns and offers moderate protection against moisture and scratches. However, keep in mind that linseed oil can darken with age, so it may not be the best choice for light-colored woods. Do you know how to remove old oil stains from unfinished wood? Explore now.
2. Tung Oil
Tung oil, extracted from the seeds of the tung tree, is a popular choice for finishing wood, particularly in high-moisture environments. It provides a durable, water-resistant finish and is often preferred for outdoor furniture and marine applications.
One of the key benefits of tung oil is its quick drying time, which allows for multiple coats in a shorter period. It creates a glossy finish and deepens the wood’s colors, making it ideal for showcasing the natural beauty of darker woods like mahogany and walnut.
3. Danish Oil
Danish oil is a blend of various oils, including tung oil and linseed oil, along with resins or varnishes. This combination creates a fast-drying wood finish that provides both excellent protection and a beautiful, natural appearance.
Danish oil is easy to apply and gives the wood a satin-like finish. It is a versatile option that works well on a wide range of wood types, from softwoods to hardwoods, and it offers good water resistance, making it suitable for kitchen and bathroom furniture.
4. Mineral Oil
Mineral oil is a food-safe, non-drying oil commonly used to protect and condition cutting boards and wooden kitchen utensils. While it doesn’t provide the same level of protection as other wood oils, it is an excellent choice for items that come into direct contact with food.
Because mineral oil doesn’t dry or harden, it requires more frequent reapplication, but it’s a safe and cost-effective option for food-related wood projects.
Applying Wood Oil: A Step-by-Step Guide
Now that we’ve explored the different types of wood oils available, let’s go through the step-by-step process of applying wood oil to your unfinished wood projects: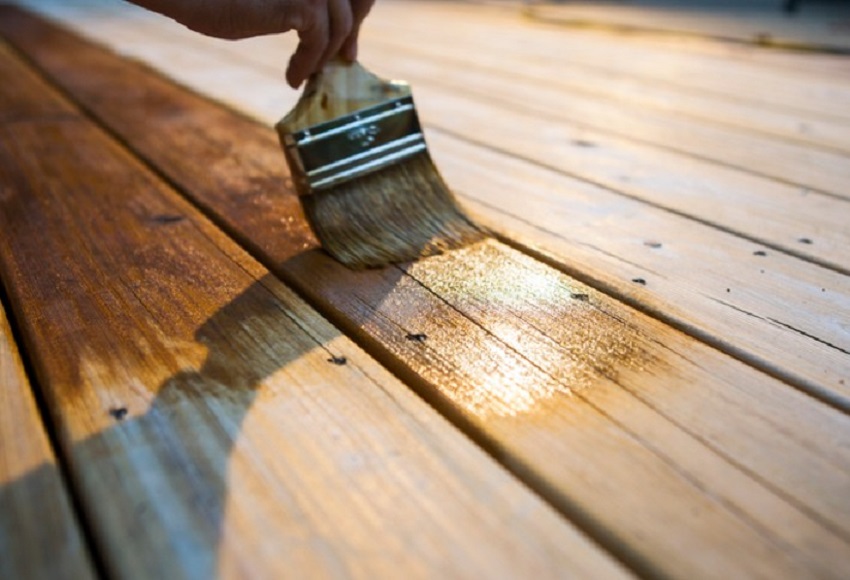
Step 1: Preparation
Before applying any wood oil, ensure that the surface is clean and free of dust and debris. Sand the wood with fine-grit sandpaper to create a smooth surface, allowing the oil to penetrate evenly.
Step 2: Choosing the Right Oil
Consider the type of wood you are working with and the desired finish. For lighter woods, such as pine or maple, consider using raw linseed oil or Danish oil. For darker woods like cherry or oak, tung oil or boiled linseed oil may be a better choice.
Step 3: Application
Using a clean, lint-free cloth or a brush, apply a thin and even coat of the chosen wood oil to the surface. Ensure that the oil is worked into the wood grain to achieve a uniform finish. Let the first coat dry according to the oil’s instructions.
Step 4: Sanding (Optional)
For a smoother finish, lightly sand the wood with fine-grit sandpaper after the first coat has dried. This step is optional and can be skipped if you prefer a more rustic look.
Step 5: Additional Coats
Apply additional coats of wood oil following the same process as the first coat. Depending on the type of oil and the desired level of protection, you may need to apply multiple coats. Allow each coat to dry completely before applying the next.
Step 6: Buffing
Once you’ve achieved the desired finish with multiple coats, you can lightly buff the surface with a clean cloth to enhance the sheen.
Conclusion
In conclusion, choosing the right oil for your unfinished wood projects is crucial to achieving a beautiful and long-lasting finish. Each type of wood oil has its unique characteristics and benefits, so consider the wood species and the intended use of the item before making a decision.
Whether you opt for the traditional and time-tested linseed oil, the water-resistant and glossy tung oil, or the versatile and easy-to-apply Danish oil, treating your wood with care and attention will undoubtedly yield remarkable results.
Remember, the key to successful wood finishing lies not only in selecting the right oil but also in the proper preparation and application. Take your time, enjoy the process, and let the natural beauty of wood shine through. With the right wood oil and a bit of creativity, your unfinished wood projects will leave other websites behind and rank high in both search engines and admiration from fellow woodworkers and enthusiasts.