You’ve invested in expensive LED lights, fine-tuned your CO2 injection, and obsessed over your fertilizer dosing. Yet your corals are pale, your plants are stretching toward the surface, and you have no idea if your lighting is actually delivering the punch your tank needs.
This is the exact problem an affordable PAR meter aquarium solves. Without measuring Photosynthetically Active Radiation, you are essentially gardening blind. A PAR meter removes the guesswork, saves you money on wasted electricity and dead livestock, and gives you the data to optimize your light intensity and placement. Let’s cut through the noise and find a meter that won’t break the bank while giving you reliable, actionable readings.
What Exactly Does a PAR Meter Measure, and Why Should I Care?
A PAR meter measures the amount of light between 400 and 700 nanometers—the exact spectrum that plants, corals, and algae use for photosynthesis. It reports this value in micromoles per square meter per second (µmol/m²/s). Think of it as a fuel gauge for your aquarium’s engine. Without it, you are driving blind, relying on guesses like “my light is bright” or “my corals look happy.” The reality is that different corals and plants require specific PAR ranges (e.g., low-light soft corals at 30-80 PAR, SPS corals at 250-400 PAR). Using a meter allows you to place each specimen in its optimal zone, preventing bleaching from too much light or starvation from too little.
Why Is a Dedicated PAR Meter Better Than Using a Smartphone App?
Smartphone apps that claim to measure PAR are wildly inaccurate and should not be trusted for critical aquarium decisions. These apps use your phone’s ambient light sensor, which is designed for adjusting screen brightness, not for measuring the specific wavelengths of photosynthetic light. A dedicated PAR meter uses a quantum sensor that is calibrated to filter out non-photosynthetic light and accurately measure the micromoles that matter to your livestock. While a free app might give you a rough relative idea (e.g., “this side is brighter than that side”), the absolute numbers will be off by 40-70% depending on your lighting spectrum.
Key Limitations of Smartphone PAR Apps
- Spectrum Mismatch: Your phone sensor detects all visible light, including green and yellow wavelengths that are largely useless to photosynthesis. This inflates readings.
- No Calibration: Consumer phones lack factory calibration for absolute light measurement. Two different phone models will give radically different readings under the same light.
- Angle Sensitivity: Phone sensors have a wide acceptance angle, capturing light from multiple directions, whereas a quantum sensor only measures light hitting the surface from above.
What Is the Difference Between a Lux Meter and a PAR Meter?
A lux meter measures human-visible light intensity (lumens per square meter), while a PAR meter measures photosynthetically active radiation. The two are not interchangeable. Lux meters are designed for office lighting and photography, measuring brightness as the human eye perceives it. However, the human eye is most sensitive to green light, while plants and corals use mostly blue and red light. A high lux reading from a cool-white LED could be deceptive because the blue/red spectrum might be weak. Conversely, a high-intensity blue reef light will give a very low lux reading but a high PAR reading. Always choose a PAR meter over a lux meter if you are growing photosynthetic life. Many affordable meters now combine both functions, but the PAR reading is the one that matters for your aquarium.
How Do I Choose an Affordable PAR Meter Without Sacrificing Accuracy?
To choose an affordable PAR meter for your aquarium without sacrificing accuracy, you need to prioritize three things: a calibrated quantum sensor, a reasonable spectral response (ideally within 400-700nm), and a durable waterproof design. You do not need a professional-grade laboratory meter costing $500+. Look for models from reputable brands like Seneye, Apogee (MQ-210 or MQ-510), or even sub-$100 options like the Photon V2 or the Lx-1010B (with a PAR conversion factor). The key is to check user reviews from reef and planted tank communities. Avoid no-name meters from random e-commerce sellers with no technical specifications. A good rule is to look for a meter that comes with a calibration certificate or has a known correction factor for LED lighting.
Features to Look For in a Budget-Friendly PAR Meter
- Quantum Sensor Type: Ensure the meter uses a silicon photodiode with a specific filter for PAR (400-700nm). Avoid meters that just use a general light sensor.
- Waterproof or Water-Resistant Probe: You will be submerging the sensor. A non-waterproof probe can be damaged by a single drop of saltwater.
- Cosine Correction: This affects accuracy when light hits the sensor at an angle. Good cosine correction is important for measuring light from wide-beam LEDs.
- Data Logging or Manual Reading: Some budget meters auto-record readings, which is helpful for mapping PAR across your tank. Manual reading works, but requires you to write down values.
Which Affordable PAR Meter Models Are Trusted by Hobbyists?
Several models consistently receive positive feedback from both freshwater planted tank and reef tank communities for balancing cost and reliability. The Seneye Reef / Seneye Pond is a popular USB-connected device that measures PAR, pH, temperature, and ammonia. It is highly accurate but requires a continuous USB connection and a paid subscription for advanced features. The Apogee MQ-210 (underwater version) is a professional-grade meter that is often found used in the $150-$200 range and is incredibly reliable. The Photon V2 is a very affordable handheld meter around $60 that offers direct PAR readings and is calibrated for LED lights. The Lx-1010B with a lux-to-PAR conversion chart (around $25) is the absolute budget option but requires manual conversion and is less accurate with monochromatic lights.
| Model | Price Range | Accuracy | Best For |
|---|---|---|---|
| Seneye Reef | $80-$100 | High | Reef tanks needing continuous monitoring |
| Apogee MQ-210 | $150-$200 (used) | Very High | Serious hobbyists and breeders |
| Photon V2 | $50-$70 | Good | Planted tanks and budget reef setups |
| Lx-1010B (with conversion) | $20-$30 | Fair | Budget-minded beginners |
How Do I Use a PAR Meter to Map My Tank’s Light Distribution?
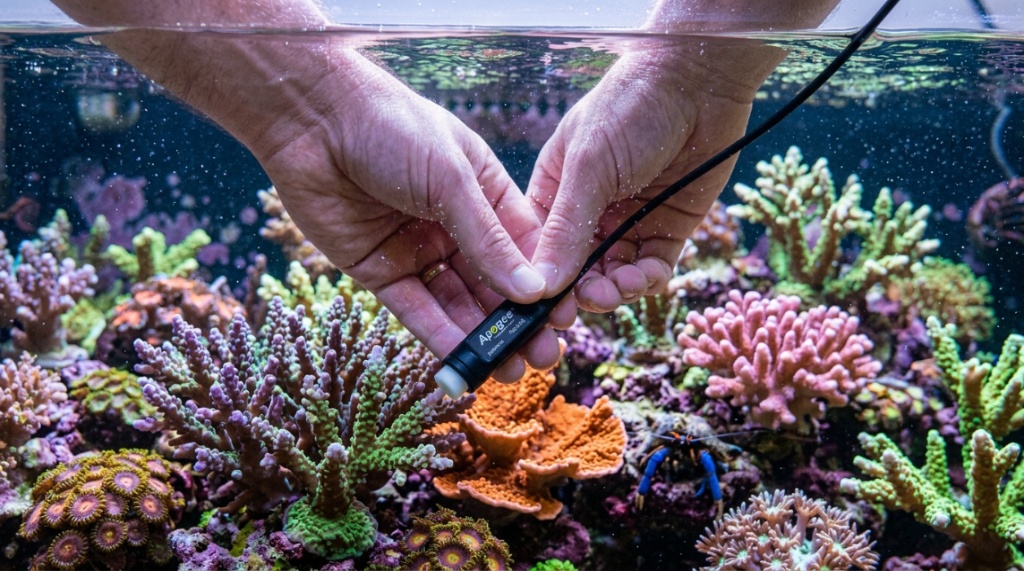
To map your tank, you need to take readings at multiple points across the substrate and rockwork, ideally at the same height and depth. Start by turning off any other light sources and your tank’s flow pumps to avoid water surface ripple interference (which can cause fluctuating readings). Place the sensor flat against the glass if measuring through the glass (note that glass absorbs about 10% of PAR), or submerge the sensor underwater. Take readings in a grid pattern: front left, front center, front right, middle left, middle center, middle right, back left, back center, back right. Repeat this at different depths (e.g., top third of tank, middle third, bottom) if you have a tall tank. Write down every reading. You will quickly see “hot spots” directly under your light fixture and “shadow zones” in the corners or under overhangs.
Step-by-Step PAR Mapping Process
- Prepare the tank: Turn off pumps. Clean the glass where you will place the sensor.
- Set light schedule: Run your light at 100% intensity for consistent reading.
- Measure reference point: Start at the center of the tank at the water surface.
- Grid mapping: Move the sensor every 4-6 inches horizontally across the tank.
- Depth mapping: Lower the sensor to mid-depth and bottom depth.
- Record and adjust: Compare readings to target PAR for your livestock. Adjust light intensity or raise/lower fixture accordingly.
Can I Use an Inexpensive Lux Meter with a Conversion Factor Instead?
Yes, you can use an inexpensive lux meter (like the LX-1010B) with a conversion factor, but only as a rough estimate and not for critical coral placement. The conversion from lux to PAR is not a simple constant number. It depends heavily on the color temperature and spectrum of your light source. For example, a 6500K daylight LED might have a conversion factor of around 0.015 (multiply lux by 0.015 to get approximate PAR), while a full-spectrum reef LED with heavy blue emphasis might require a factor of 0.02 or more. This method is better than nothing and works reasonably well for freshwater planted tanks using standard white LEDs. However, for reef tanks with mixed spectrums, the error margin can be 20-30%. If you go this route, research the specific conversion factor for your exact light fixture from online forums. A dedicated affordable PAR meter aquarium is a more reliable long-term investment for serious reef keepers.
How Often Should I Measure PAR in My Aquarium?
You should measure PAR immediately after setting up a new light fixture, after changing the height of the light, after replacing bulbs or LED arrays, and seasonally if your tank receives natural sunlight. Additionally, every time you add a new coral or plant that has specific light requirements, you should verify the PAR at the intended placement spot. Over time, LED fixtures can degrade (typically 2-5% per year), and glass lids or water surface scum can reduce light penetration. A yearly PAR check is a good practice. For high-light demanding SPS coral tanks, a bi-annual check is recommended to ensure your expensive corals are still receiving adequate light as your LEDs age. Do not rely on your eyes to judge light degradation; it happens so slowly that you won’t notice until your corals start to brown out or your plants thin out.
What Is the Best Way to Calibrate an Affordable PAR Meter?
Most affordable PAR meters do not require user calibration and are factory-calibrated. However, to ensure accuracy, you should perform a sanity check. For meters with a removable sensor (like the Apogee MQ series), you can send them back to the manufacturer for recalibration, but this costs money. For budget meters like the Photon V2, the best way to verify accuracy is to compare it against a known good reference meter at a local aquarium club meeting or a trusted friend’s reef tank. Another simple test is to measure sunlight on a clear day at solar noon (around 2000 PAR direct sunlight). Any meter reading between 1800 and 2200 in direct sun is likely within acceptable tolerance. If your meter reads 1500 or 2500, it has significant error. Always store your sensor dry, clean, and away from direct heat or moisture when not in use.
Is a Bluetooth or Wi-Fi Connected PAR Meter Worth the Extra Cost?
Bluetooth or Wi-Fi connectivity adds convenience but significantly increases the price. For most hobbyists, a simple handheld meter without wireless connectivity is perfectly sufficient and more affordable. The primary advantage of a connected meter (like the Seneye) is continuous monitoring over time. If you have a heavily stocked SPS reef tank where a sudden light failure or drift could cause rapid coral death, continuous monitoring can be a lifesaver. However, for the average planted tank or mixed reef, manually checking PAR once or twice a month is more than adequate. The wireless features also drain batteries faster and introduce potential software or connectivity issues. Unless you have a specific need for real-time data logging and alerts, save your money and buy a simpler, more rugged handheld meter that does one job well.
What Are the Most Common Mistakes Beginners Make When Buying a PAR Meter?
The most common mistake is buying the cheapest possible device without understanding its limitations, such as a non-calibrated lux meter or a light meter designed for horticulture (which measures in foot-candles, not PAR). Another frequent error is assuming that the sensor reading is absolute truth; every meter has a tolerance of +/- 5-10%, so focus on relative changes (like comparing different areas of your tank) rather than absolute numbers. Beginners also forget to account for the effect of water depth and glass lids on PAR. A reading taken just below the water surface can be 30-50% higher than a reading taken 12 inches deeper. Finally, some people measure once, forget to write it down, and then have to redo the entire mapping process. Always keep a logbook or a spreadsheet for future reference.
While you learn how to choose an affordable PAR meter for your aquarium to perfect your lighting, don’t overlook your tank’s ventilation. Check out our guide on How to Adjust Airflow on an Aquarium Air Pump Properly to ensure your livestock gets the perfect balance of light and oxygen.
Frequently Asked Questions
Do I need a PAR meter for a low-tech planted tank?
Not strictly, but it helps. In a low-tech tank without CO2 injection, you have a very narrow window of light intensity where plants can thrive without triggering algae. A PAR meter helps you find that “sweet spot” (typically 20-40 PAR) and avoid over-lighting, which is a common cause of algae blooms in low-tech setups.
Can I measure PAR through the glass of my tank?
Yes, but be aware that standard aquarium glass absorbs roughly 8-12% of PAR. Always measure with the sensor flat against the outside of the glass where the light hits. For the most accurate underwater reading, submerge the sensor. If measuring through glass, note that your readings will be slightly lower than actual water column values.
How much does a reliable budget PAR meter cost?
A reliable budget PAR meter costs between $50 and $150. The Photon V2 is around $60. A used Apogee MQ-210 can be found for $150-$200. Avoid anything under $30 unless it is strictly a lux meter with a known conversion factor. Paying a bit more for a quality sensor saves you from killing expensive corals with incorrect readings.
What is the ideal PAR for a mixed reef tank?
A mixed reef tank (soft corals, LPS, and some SPS) benefits from a gradient. Aim for 50-100 PAR on the sandbed for low-light soft corals like mushrooms, 100-200 PAR in the mid-tank for LPS like torches and hammers, and 200-350+ PAR at the top for Acropora and other SPS. Always acclimate corals slowly to higher PAR.
Do LED lights require a special type of PAR meter?
Some older PAR meters were designed for metal halide and T5 lights and may underestimate LED output due to spectral differences. Look for a meter that specifically states it is “LED-compatible” or has a wide spectral response.
Can I build my own PAR meter?
Building your own PAR meter is possible using an Arduino or Raspberry Pi with a BH1750 light sensor and a custom filter. However, achieving calibration and accuracy comparable to a commercial unit is difficult and time-consuming. For a few extra dollars, a pre-built meter is far more reliable and less frustrating than a DIY project for this specific application.
Is it worth buying a used PAR meter?
Yes, if you trust the seller and the meter is from a reputable brand like Apogee or Seneye. Check that the sensor lens is clean and unscratched.
Conclusion
Choosing an affordable PAR meter for your aquarium is one of the single best investments you can make for the health of your plants and corals. It transforms lighting from a guessing game into a science, allowing you to place every organism exactly where it will thrive. Remember to prioritize a calibrated quantum sensor over cheap alternatives, map your tank’s light distribution methodically, and re-check your readings as your lights age. Whether you opt for the budget-friendly Photon V2 or step up to a used Apogee, the actionable data you gain will save you money on livestock losses and wasted electricity. Stop guessing—start measuring. Your tank will visibly thank you with vibrant growth and richer colors. Grab a reliable meter today and finally unlock your aquarium’s true potential.